Integrating QuickBooks Expense Module with Salesforce Using LWC and REST API
Managing business expenses efficiently is crucial for financial tracking and reporting. QuickBooks is a popular accounting software, and integrating its Expense module with Salesforce allows businesses to manage financial data seamlessly. In this blog, we will explore how to integrate QuickBooks with Salesforce using LWC (Lightning Web Component), Apex, and REST API.
This integration enables users to create, view, and manage expenses directly within Salesforce, ensuring data consistency and reducing manual data entry.
What is QuickBooks?
QuickBooks is a widely used accounting software that helps businesses manage their finances, including invoicing, payroll, expenses, and financial reporting. It is particularly popular among small and medium-sized enterprises (SMEs) for its ease of use and integration capabilities.
Why Integrate QuickBooks Expense Module with Salesforce?
Integrating QuickBooks Expense Module with Salesforce allows businesses to:
- Sync expense data between QuickBooks and Salesforce in real-time.
- Reduce manual data entry and errors.
- Automate financial reporting within Salesforce.
- Improve overall expense management efficiency.
Step 1: Sign Up for an Intuit Developer Account
To get started with QuickBooks integration, you need an Intuit Developer Account. You can create one for free using the following link:
Sign up for an Intuit Developer Account
Once your account is set up, you will automatically receive access to a QuickBooks sandbox company. This allows you to test API functionalities in a controlled environment.
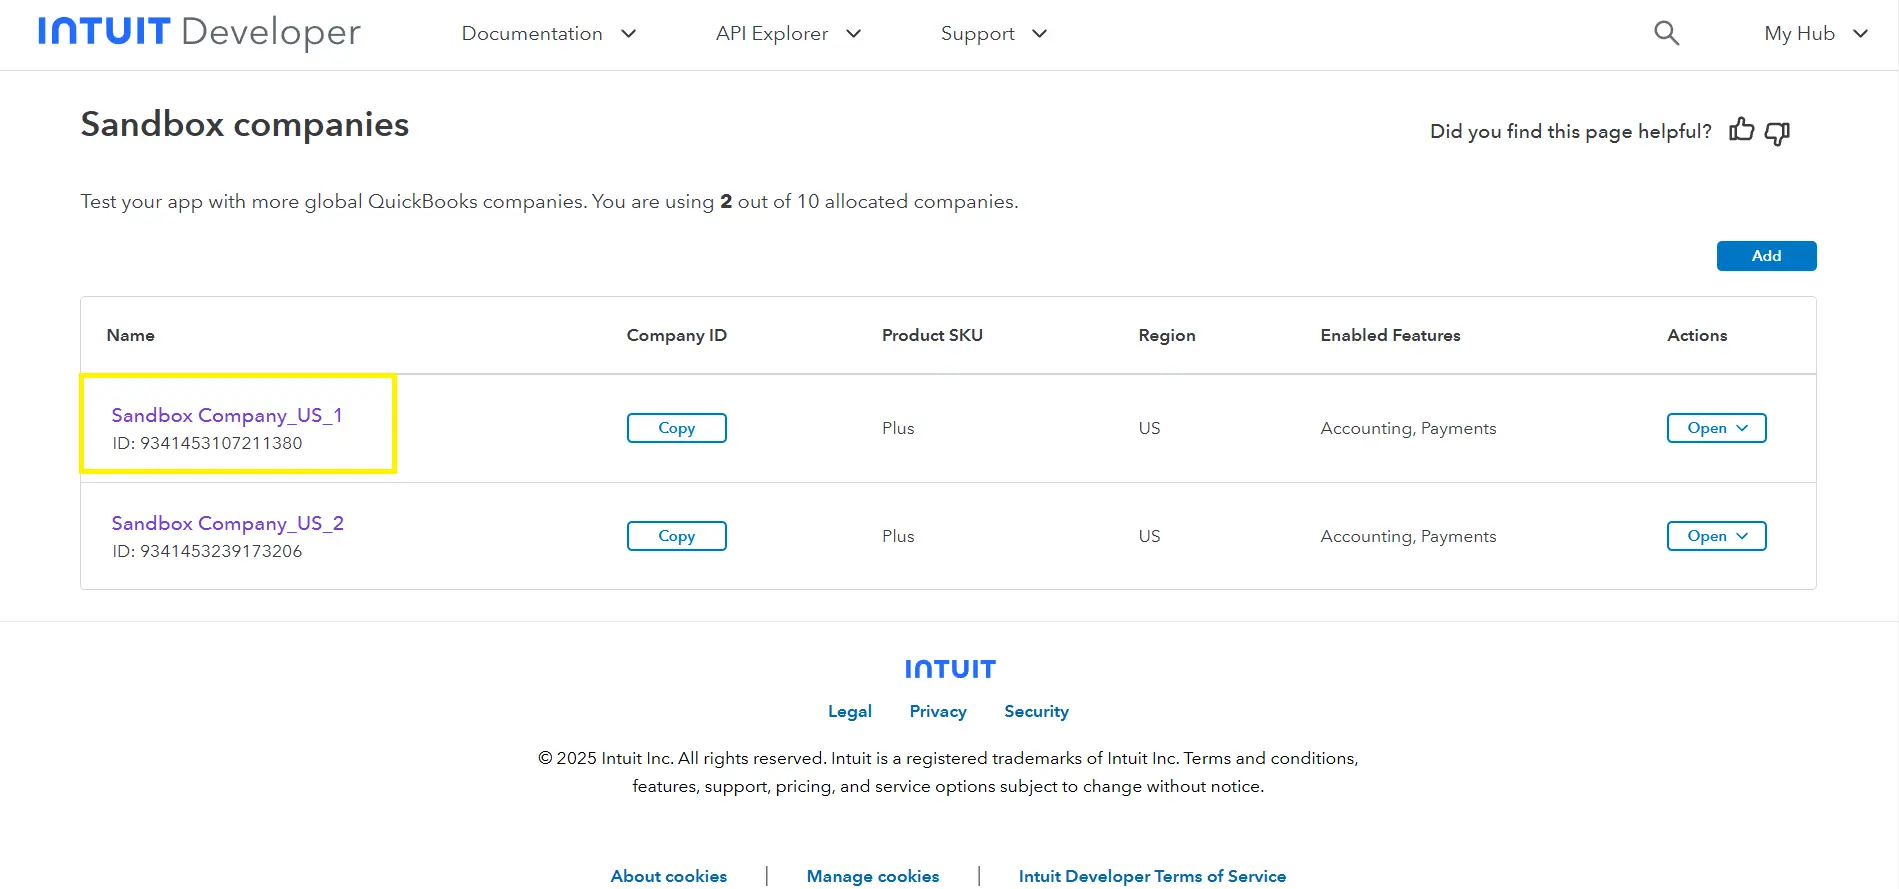
To explore QuickBooks APIs, visit the API Explorer.
Step 2: Register an App in Intuit Developer Portal
Registering an app generates development keys that will be used to authenticate API calls. Follow these steps to create an app:
- Log in to the Intuit Developer Portal.
- Click on Dashboard from the top-right menu.
- Under the My Apps Dashboard, select + Create an App.
- Choose QuickBooks Online and Payments as the platform.
- Enter a suitable App Name and select the necessary scopes.
- Click Create App to proceed.
- Navigate to the Keys and OAuth section under the Development tab in the left sidebar.
- Copy your Client ID and Client Secret, which will be required for API authentication.
Your app will require an OAuth 2.0 Access Token to connect with QuickBooks Online.
Step 3: Generate an OAuth 2.0 Access Token
To interact with QuickBooks APIs, you must generate an OAuth 2.0 Access Token. You can use Postman to obtain this token by following the steps in the guide below:
Set Up and Test API Queries in Postman
This token will be used in API requests to authenticate your application.
Step 4: Create Remote site setting
When making an Apex callout to an external website, it is important to register the target website within the Remote Site Settings page. This is because Salesforce has strict limitations on calls to unregistered network addresses, and not registering the target site will result in the callout failing.
- Go to Setup in Salesforce.
- Search for Remote Site Settings in the Quick Find box.
- Click New Remote Site.
- Enter a Remote Site Name (e.g., QuickBooks_API).
- Enter the Remote Site URL (e.g., https://sandbox-quickbooks.api.intuit.com).
- Check the Active box and click Save.
This step ensures that Salesforce allows external API calls to QuickBooks.
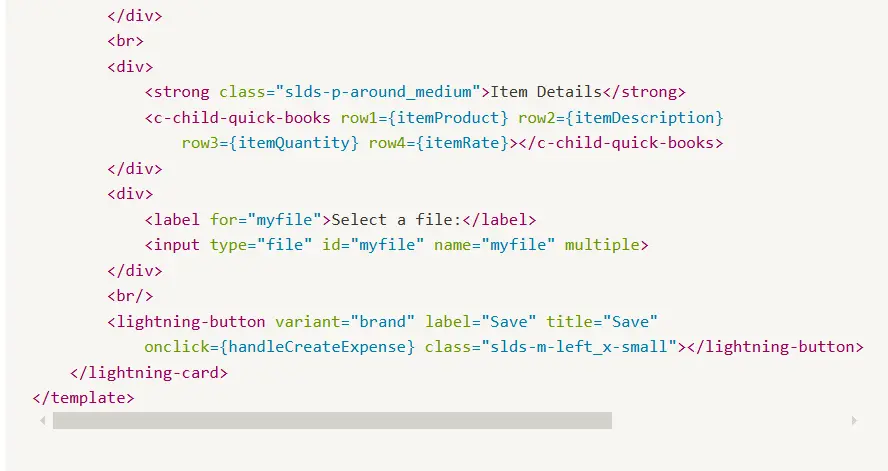
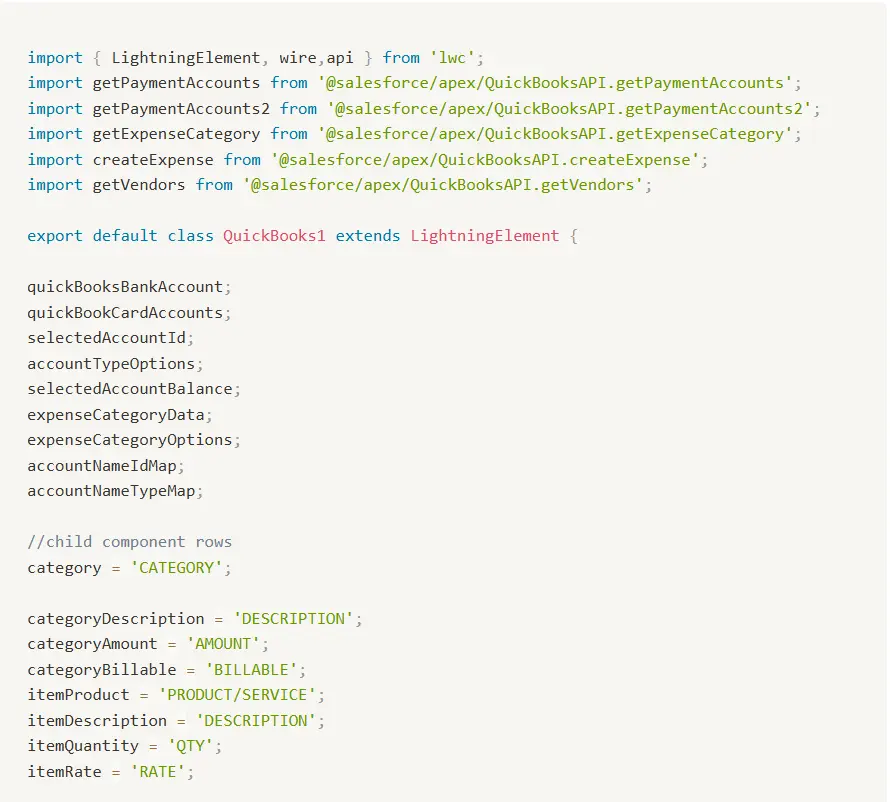
Step 5: Creating the LWC Component for Expense Management
The LWC component will provide a user-friendly interface to manage expenses inside Salesforce.
Key Features of LWC:
- Dropdowns for selecting Payee, Account, and Payment Method
- Input fields for Payment Date, Amount, and Reference Number
- Dynamic rows for Category and Item Details
- File Upload for receipts
- Save Button to sync data with QuickBooks
Sample HTML file:

Sample JavaScript file:
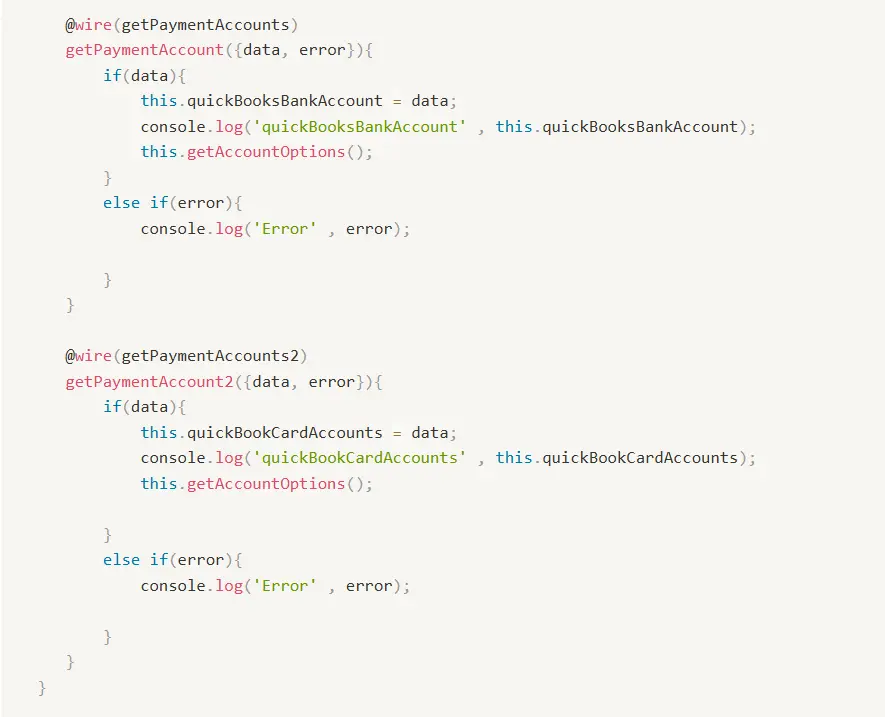
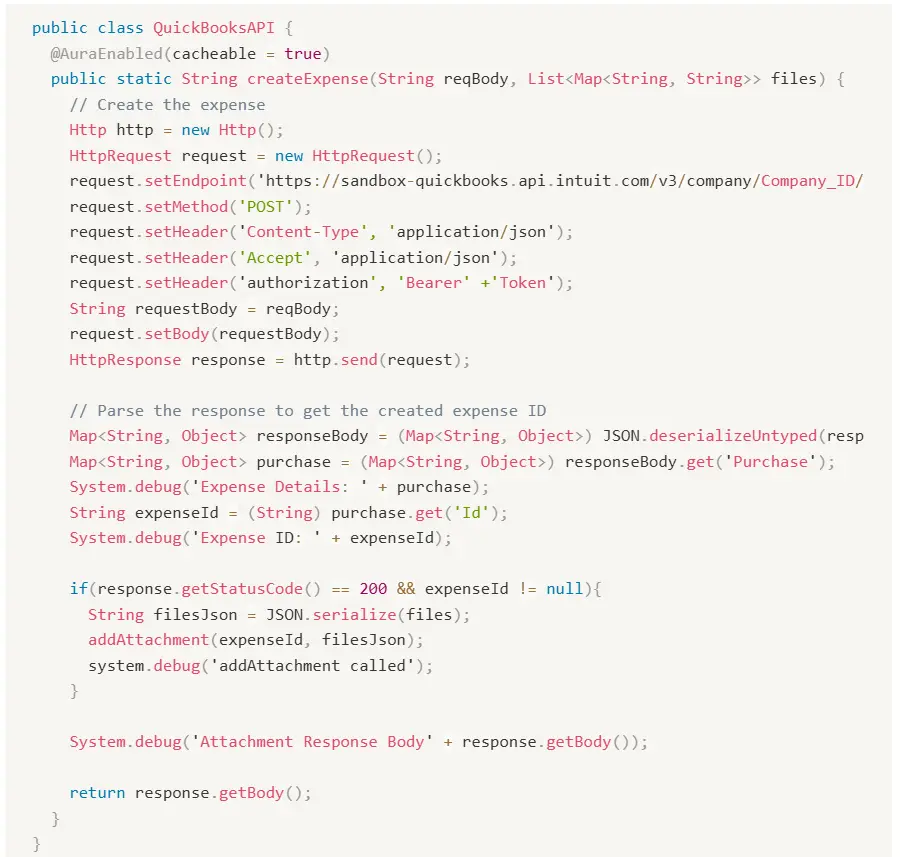
Sample Apex Class:
Step 6: Deployment
Deploy your LWC component and Apex class to the desired Salesforce org. Once deployed, your integration will be fully functional.
Watch the demo video showcasing how the integration works.
Conclusion: Streamlining Expense Management to QuickBooks with Salesforce
Integrating QuickBooks with Salesforce using LWC and Apex enhances expense tracking, reduces errors, and improves efficiency. By following these steps, businesses can seamlessly connect QuickBooks with Salesforce and optimize their financial workflows. This integration not only enhances financial tracking but also ensures a seamless connection between QuickBooks and Salesforce for smarter business decisions. With real-time data synchronization, businesses can eliminate manual data entry, reduce errors, and focus on strategic financial planning, making expense management more efficient and hassle-free.
Stay curious, keep experimenting, and we’ll see you in the next release update. Also, stay tuned with The Pinq Clouds available on AppExchange for insightful blogs and updates. Happy coding!