Mastering Custom Permissions in Salesforce Flows
Salesforce provides powerful tools for managing user access and controlling what users can do within an org. One of these tools is Custom Permissions — a flexible way to define and check user permissions beyond standard object and field-level security. In this blog, we will see how you can use Custom Permissions in Salesforce Flow. We’ll cover how to create custom permissions, assign them to profiles or permission sets.
What Are Custom Permissions?
Custom permissions allow you to define specific access rights and use them in various places, like validation rules, Apex classes, Lightning components, and even Flows. For example, you might create a custom permission called Account_Feature to control which users can create account.
Why Use Custom Permissions?
- Granular Control: Manage specific actions that don’t fit neatly into profiles or permission sets.
- Simplify Validation Rules: Bypass rules for certain users without adding complex logic.
- Flexible Access Management: Update permissions without changing profiles or code.
How to Create Custom Permissions in Salesforce
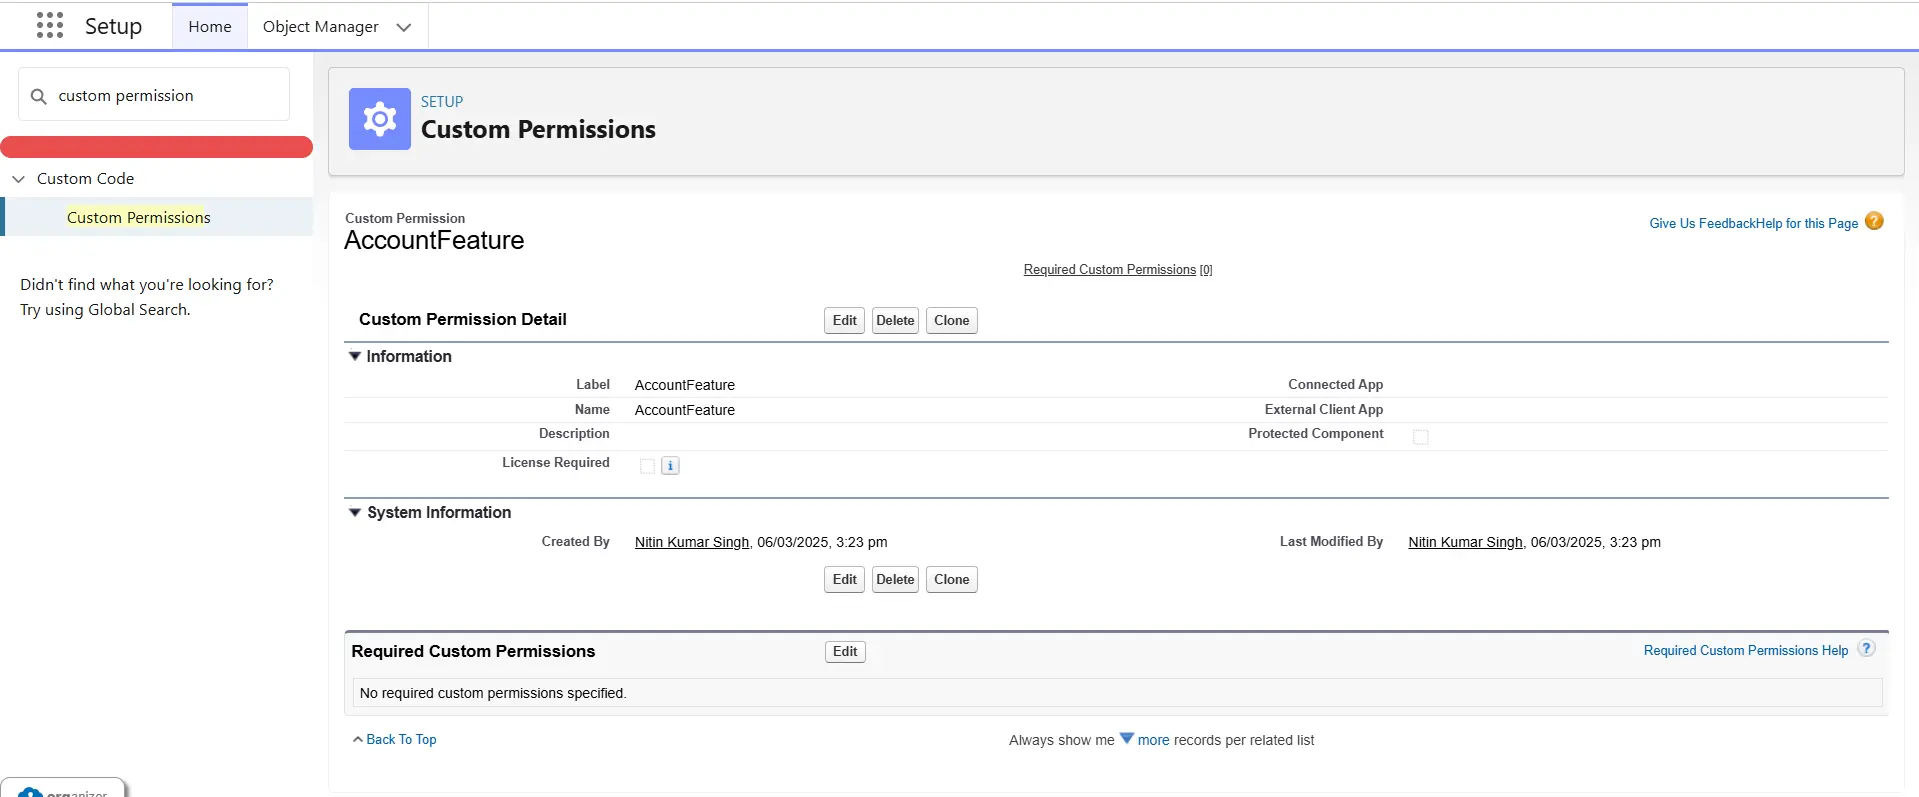
- Go to Setup and in the Quick Find box enter “Custom Permissions”.
- Select Custom Permissions and click New.
- Enter a Name (e.g., AccountFeature) for your custom permission.
- Click Save.
Create Permission Set in Salesforce
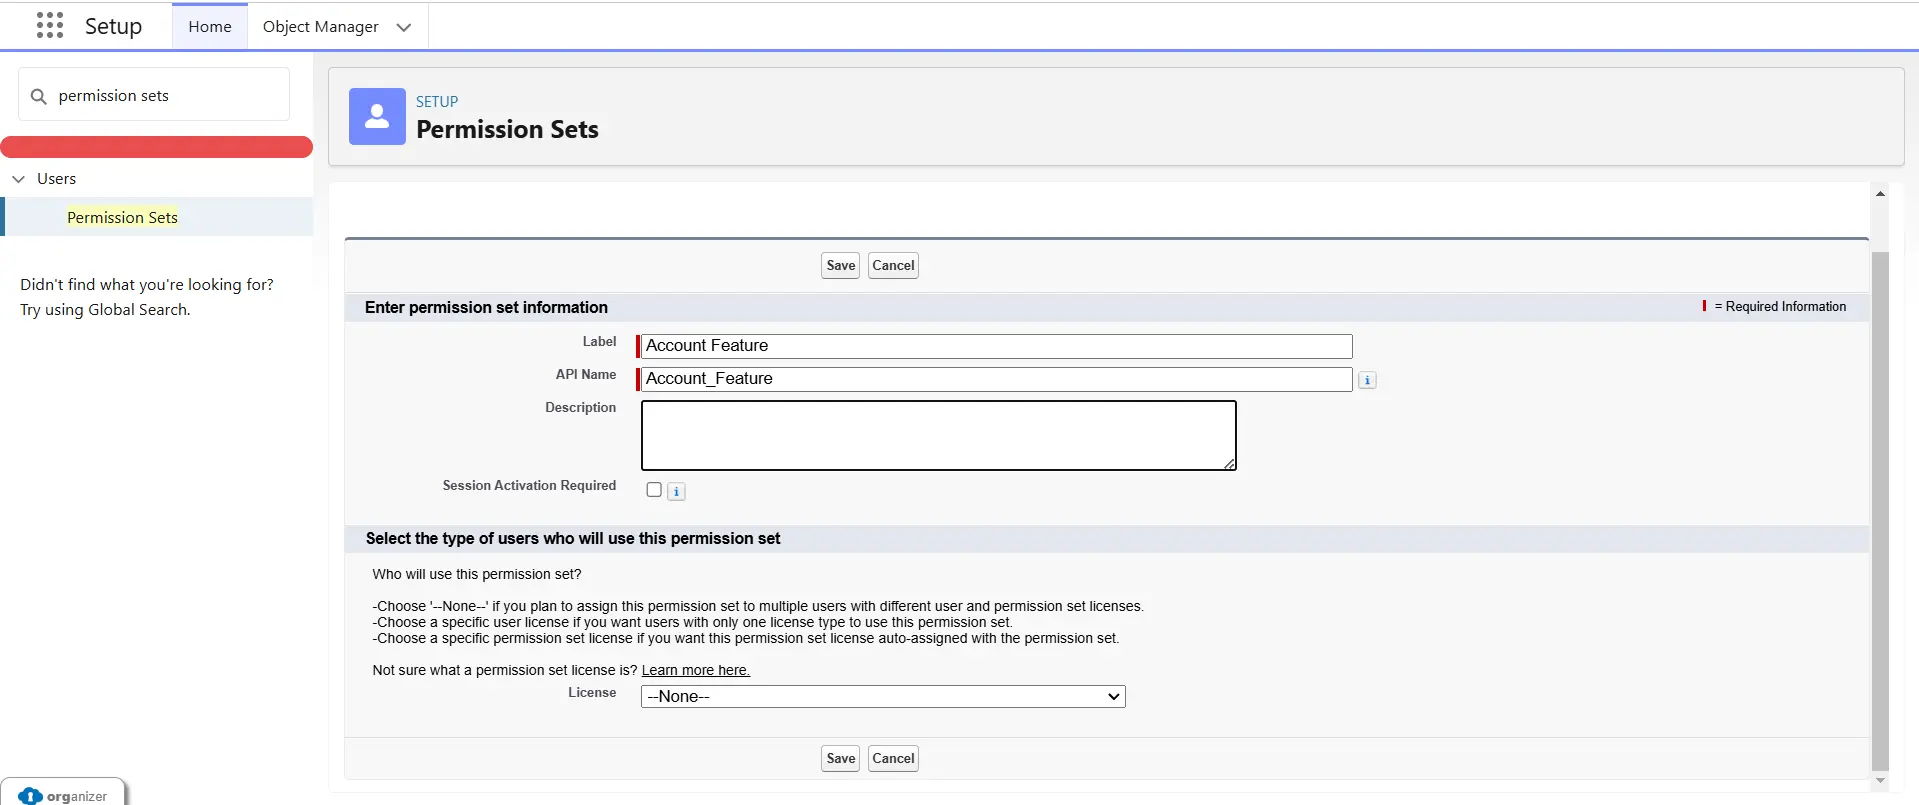
- Go to Setup and in the Quick Find box enter “Permission Sets”.
- Select Permission Sets and click New.
- Enter a Name (e.g., Account Feature) for your permission set.
- Click Save.
Assigning Custom Permissions to a Permission Set
- Go to Setup and in the Quick Find box enter “Permission Sets”.
- Select the Permission set which you have created (e.g., Account Feature)
- Scroll below and Click Custom Permissions.
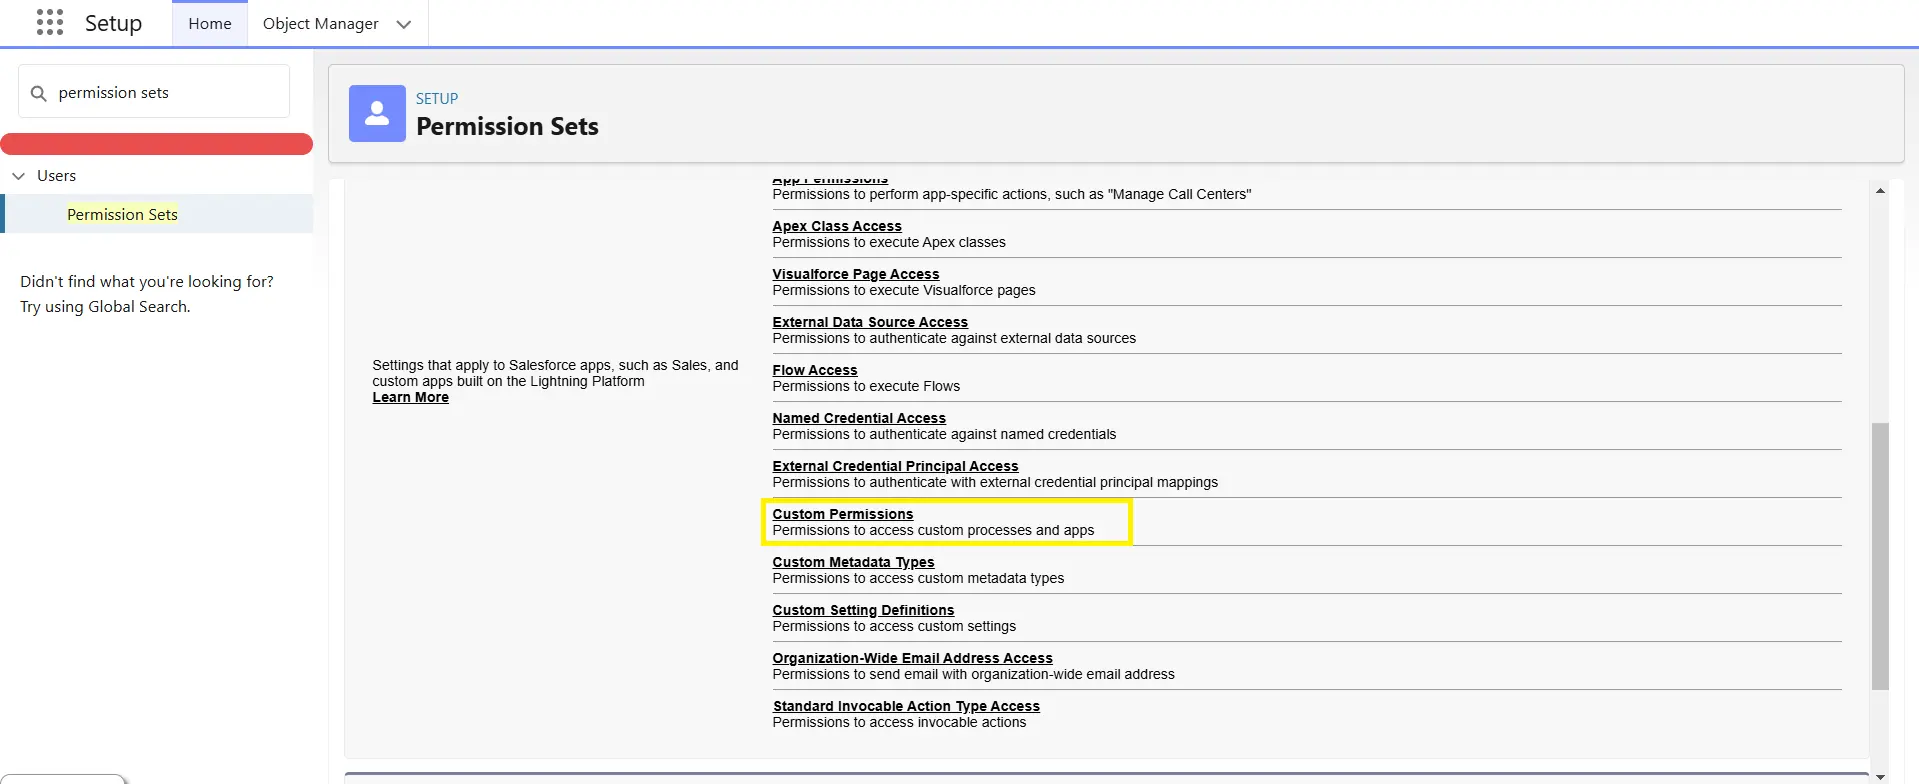
- Click Edit and choose your custom permission from the Available Custom Permissions list.
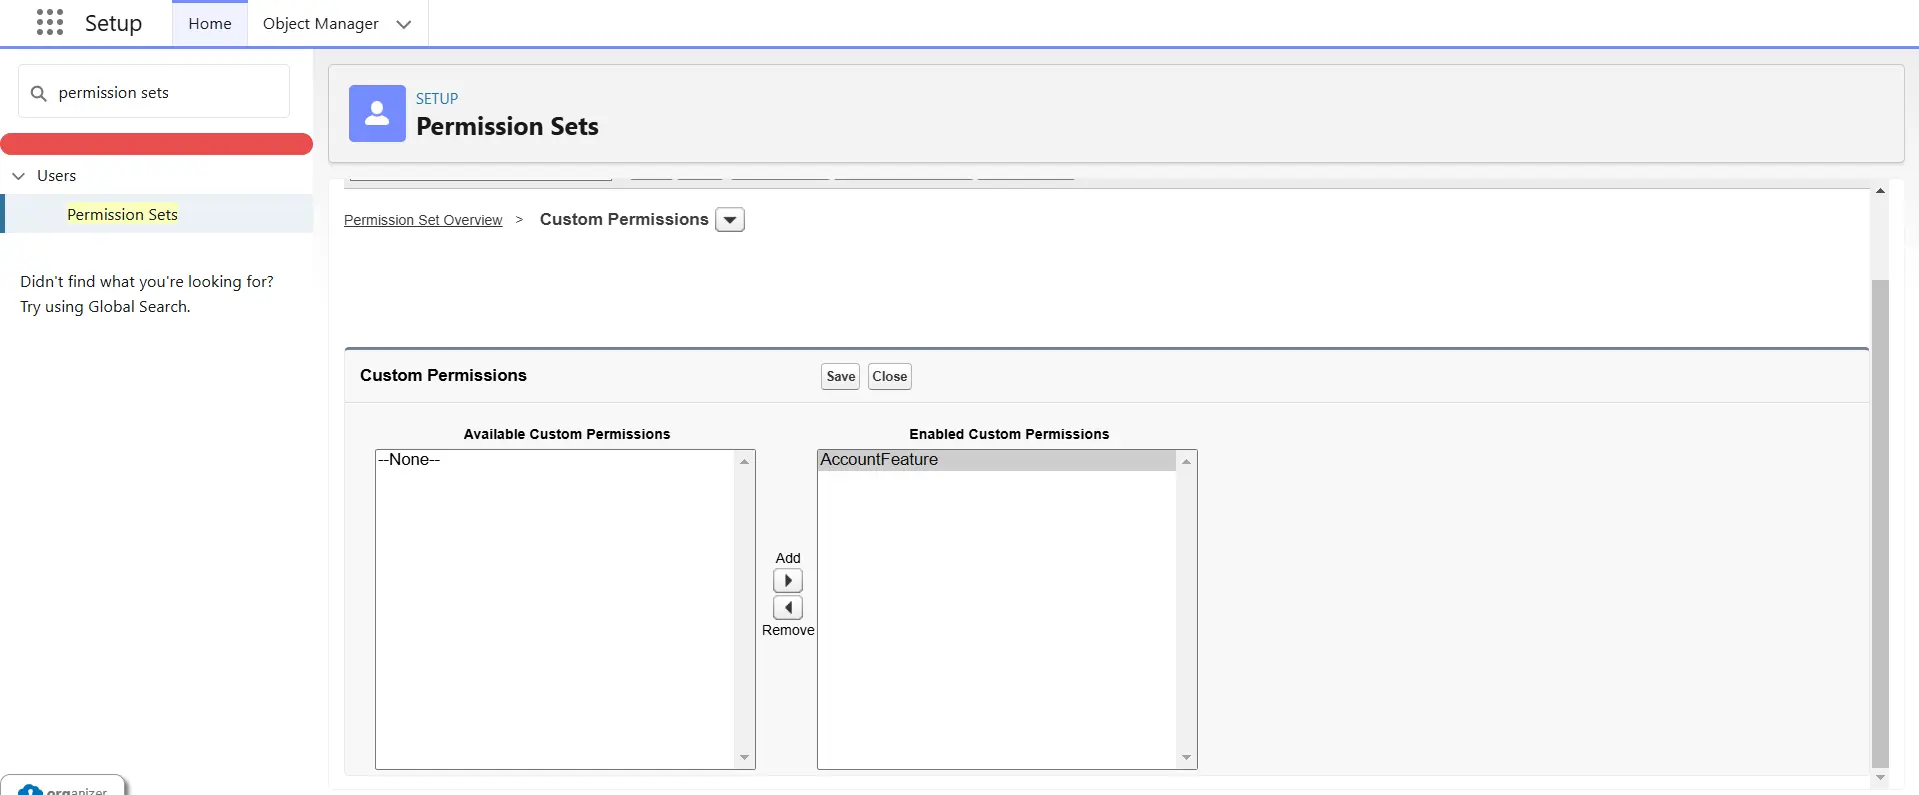
- Click Add and then Save.
Using Custom Permissions in Flows
- In Salesforce Flows, you can use custom permissions to control flow execution:
- To create Flow Go to Setup and in the Quick Find box enter “Flows”.
- Select “Start From Scratch” and click on Next.
- Select Screen Flow and click on Create.
- In the start click on Add element and select Screen element.
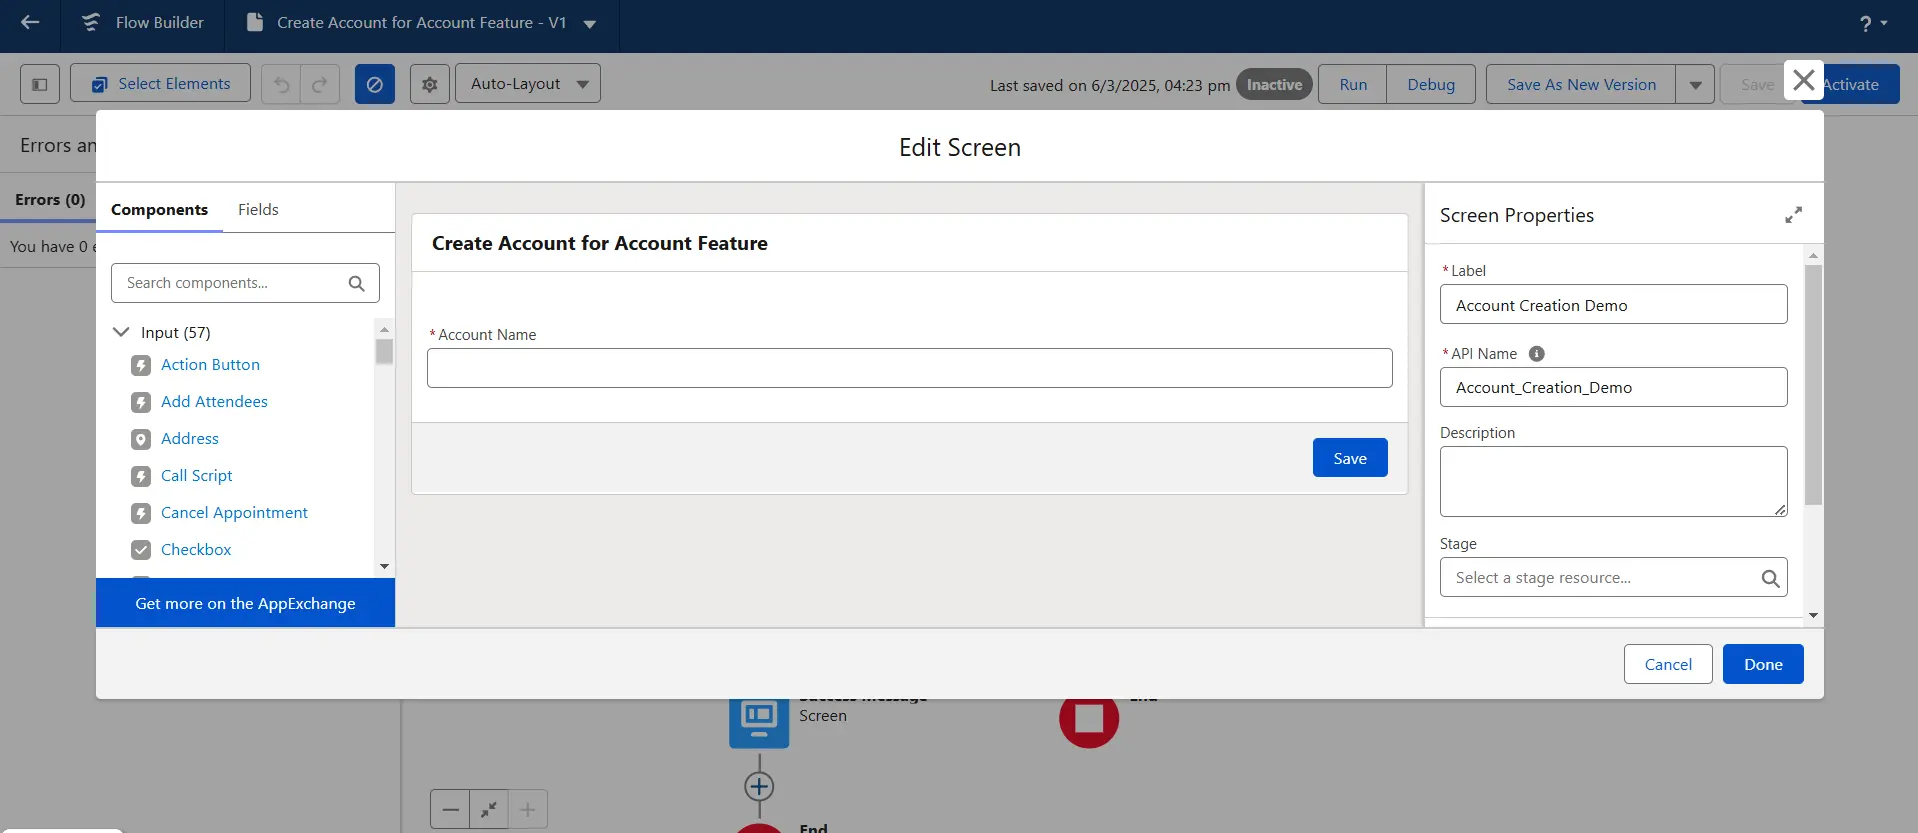
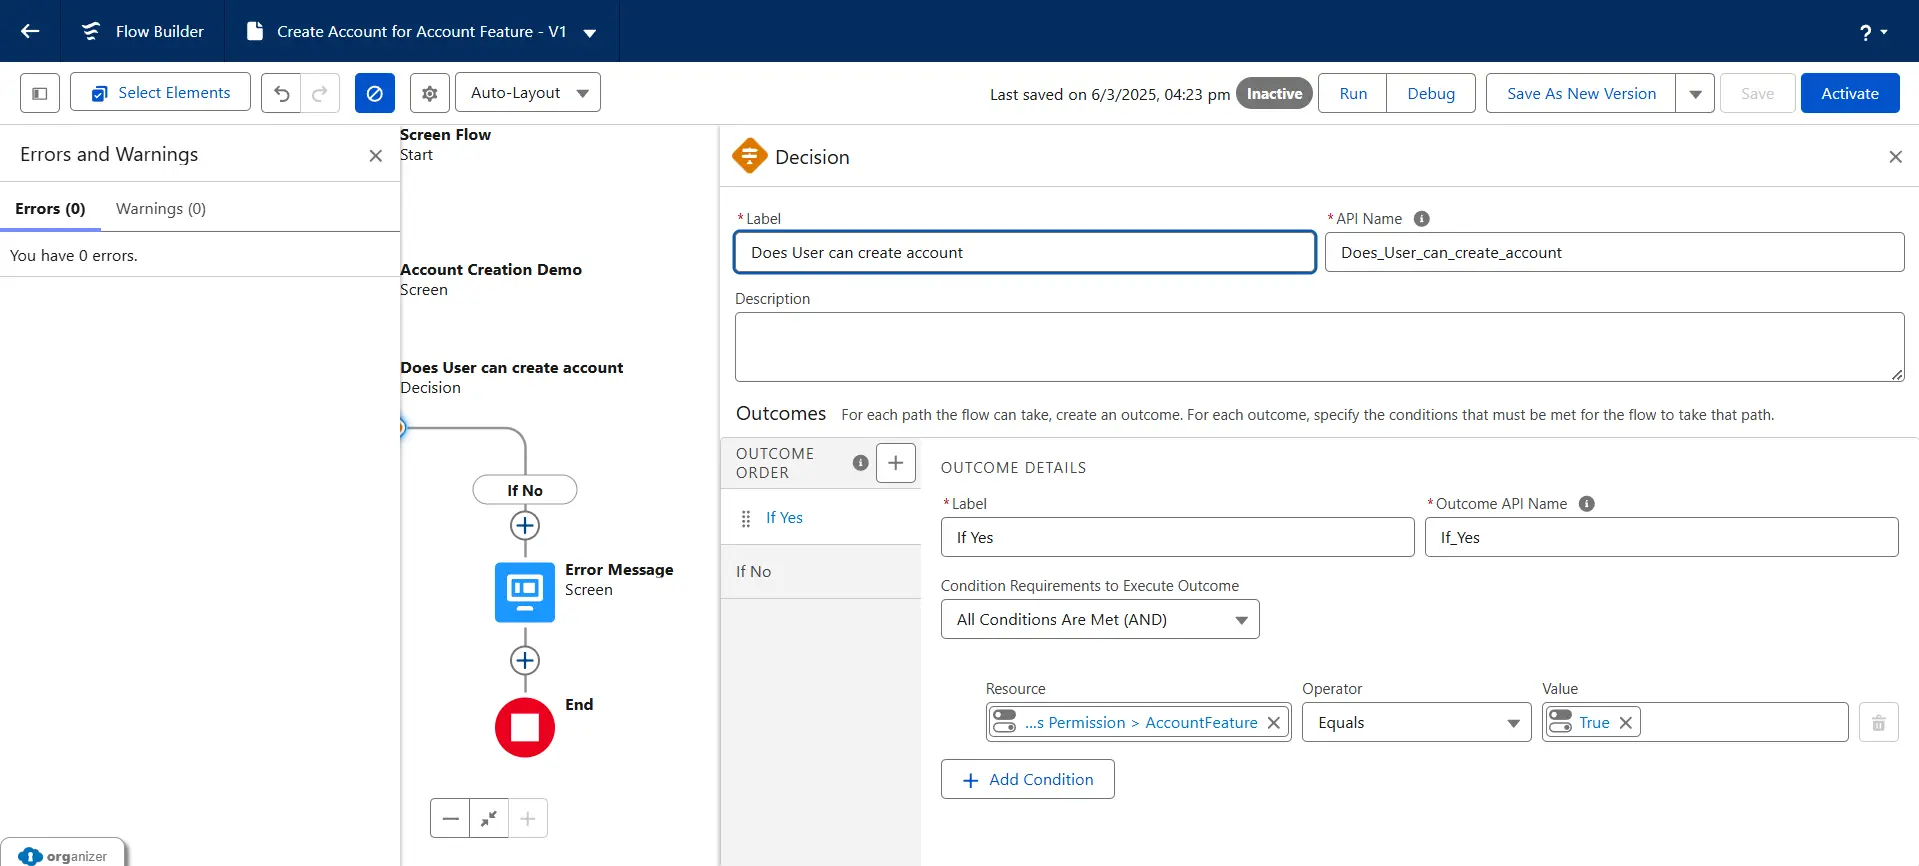
- Now we will add Decision element to check user has that Permission or not to create account.
- Now in the yes condition we will add Create Records element to create account.
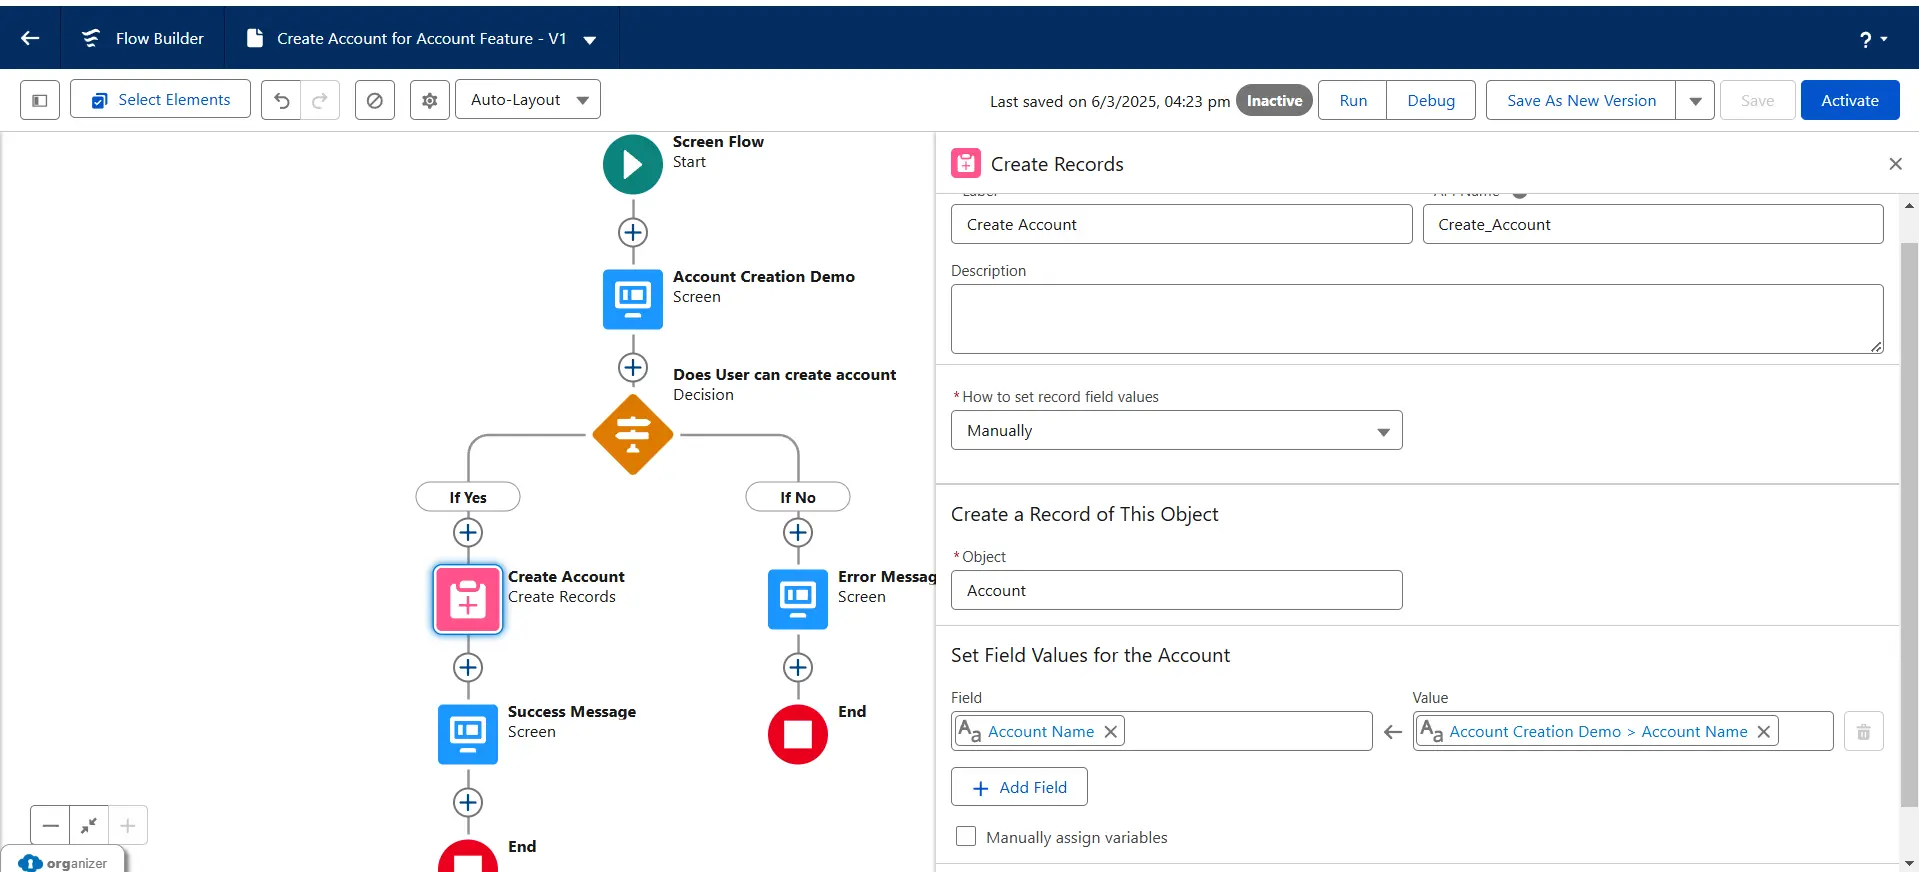
- Additionally we can create success or error message screen to show the screen after creating account.
- Now click on Save and Activate the flow.
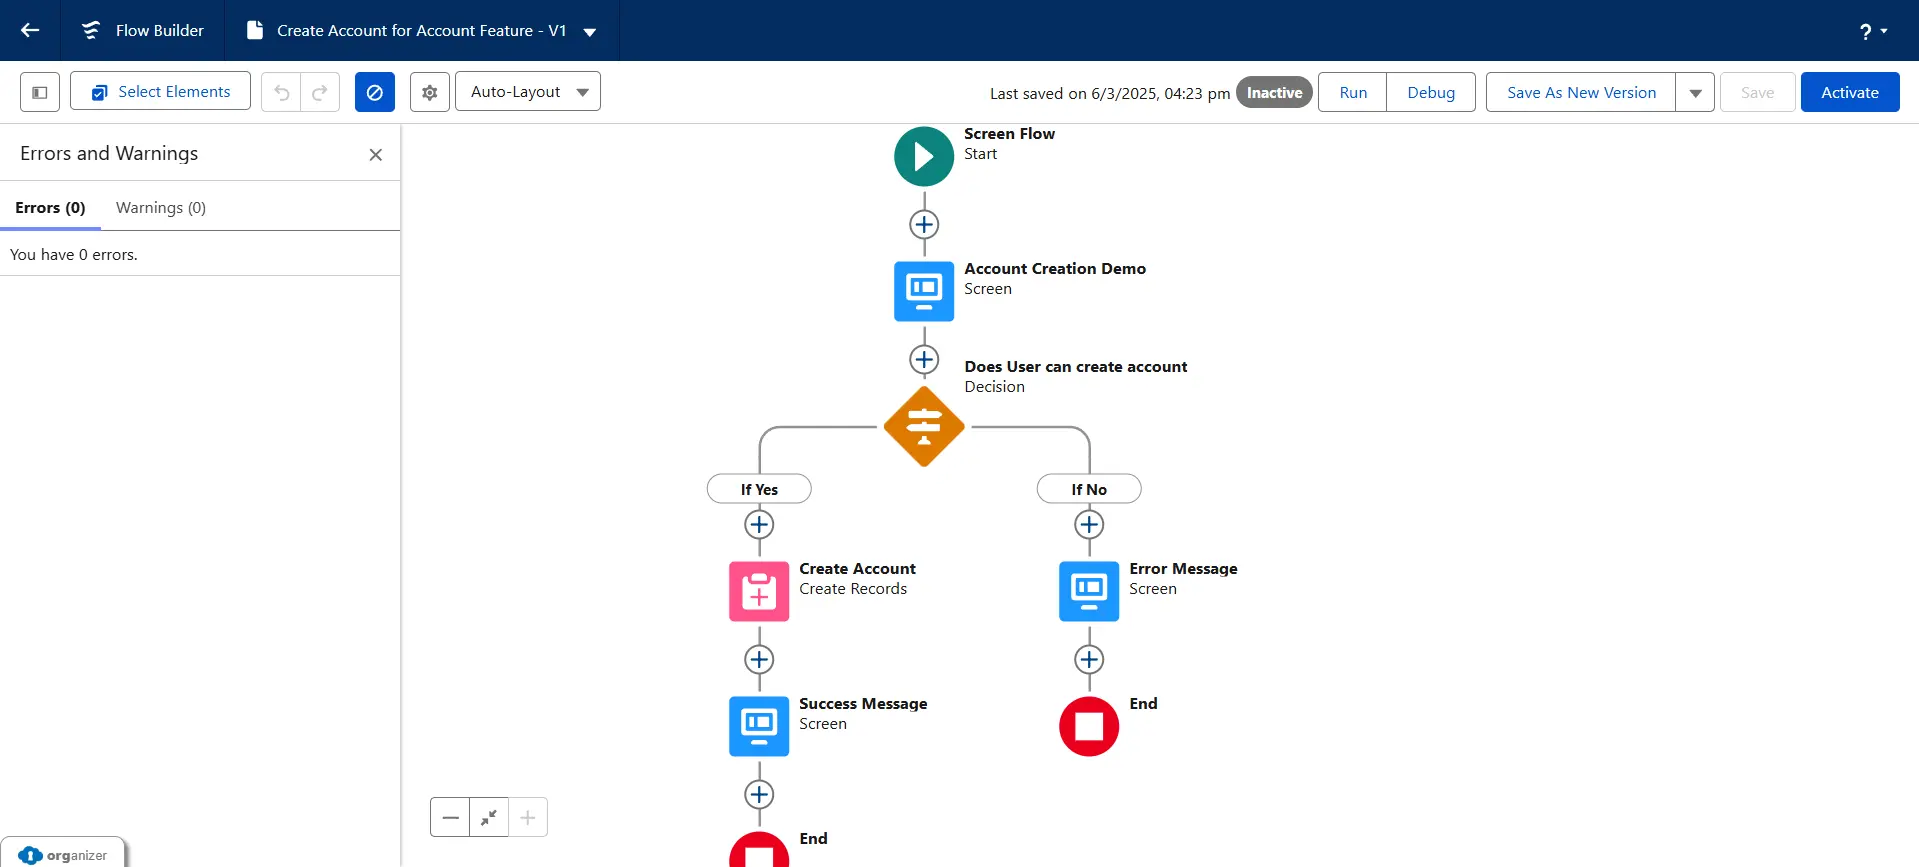
- You can also Debug it before Activating the flow.
Now we will place this screen flow in our record page by following the below steps:
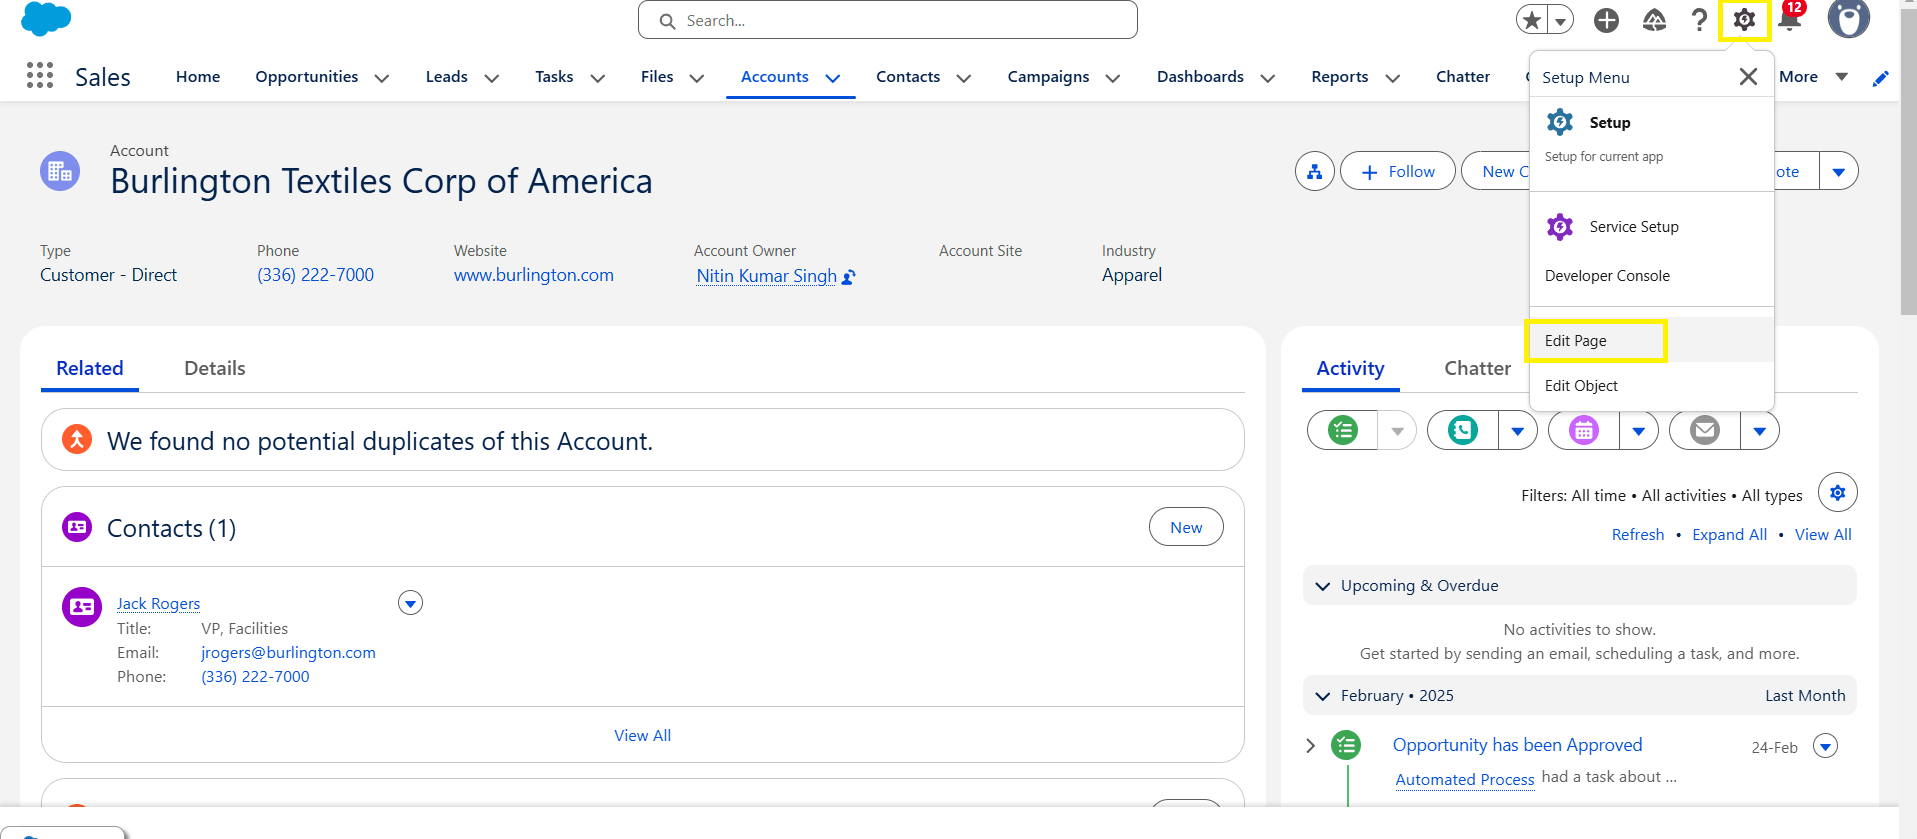
- Go to Account Records and click on gear icon on the top right corner.
- click on “Edit Page”.
- On the Left side search bar click on Flow and drag and drop this element to where you want to place it.
- Now on the right side click on Flow and choose your flow name from the dropdown.
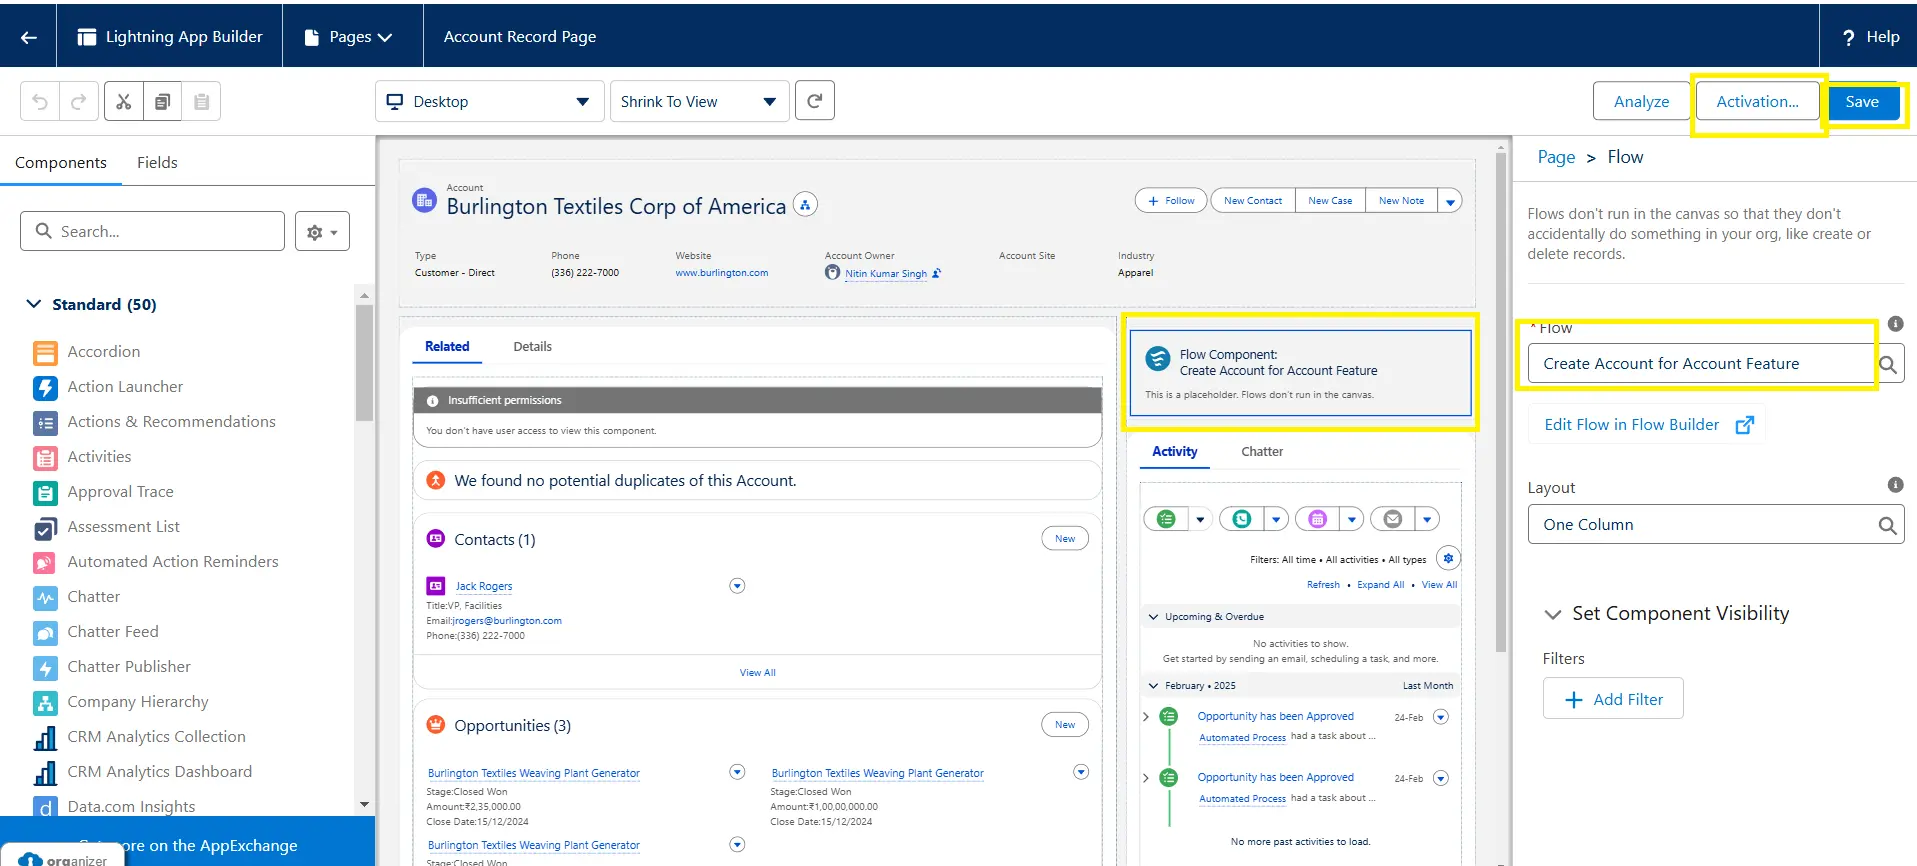
- After selecting the flow click on Save and Activate it.
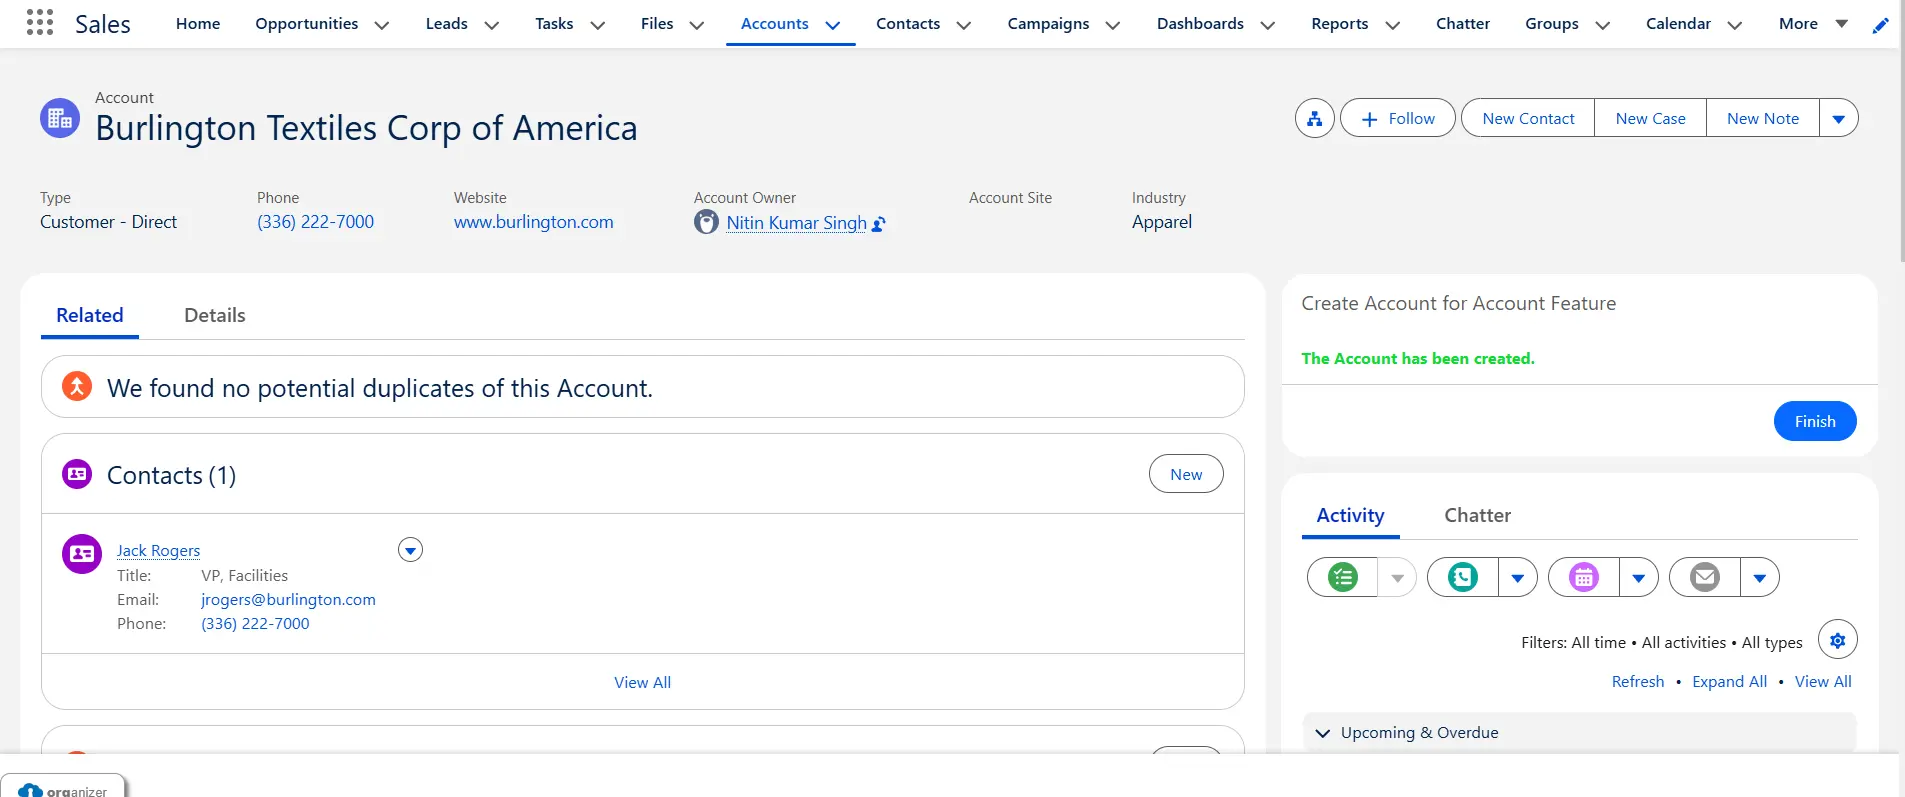
- Now it will look like this in the below picture.
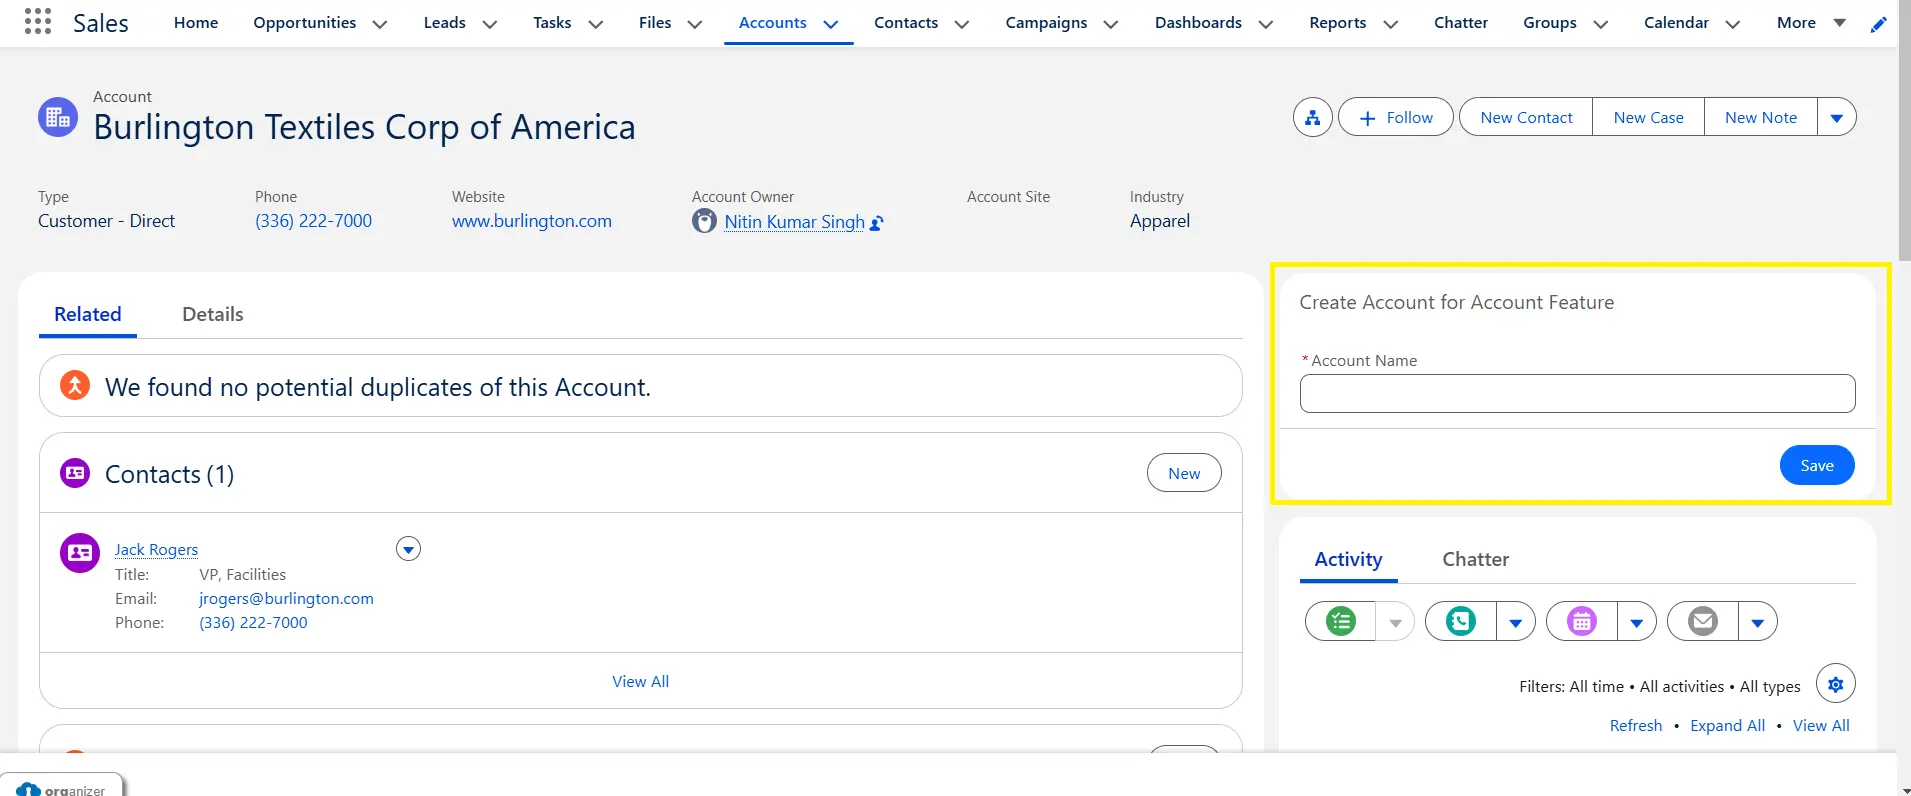
- Now we will test it in our org by creating an account.
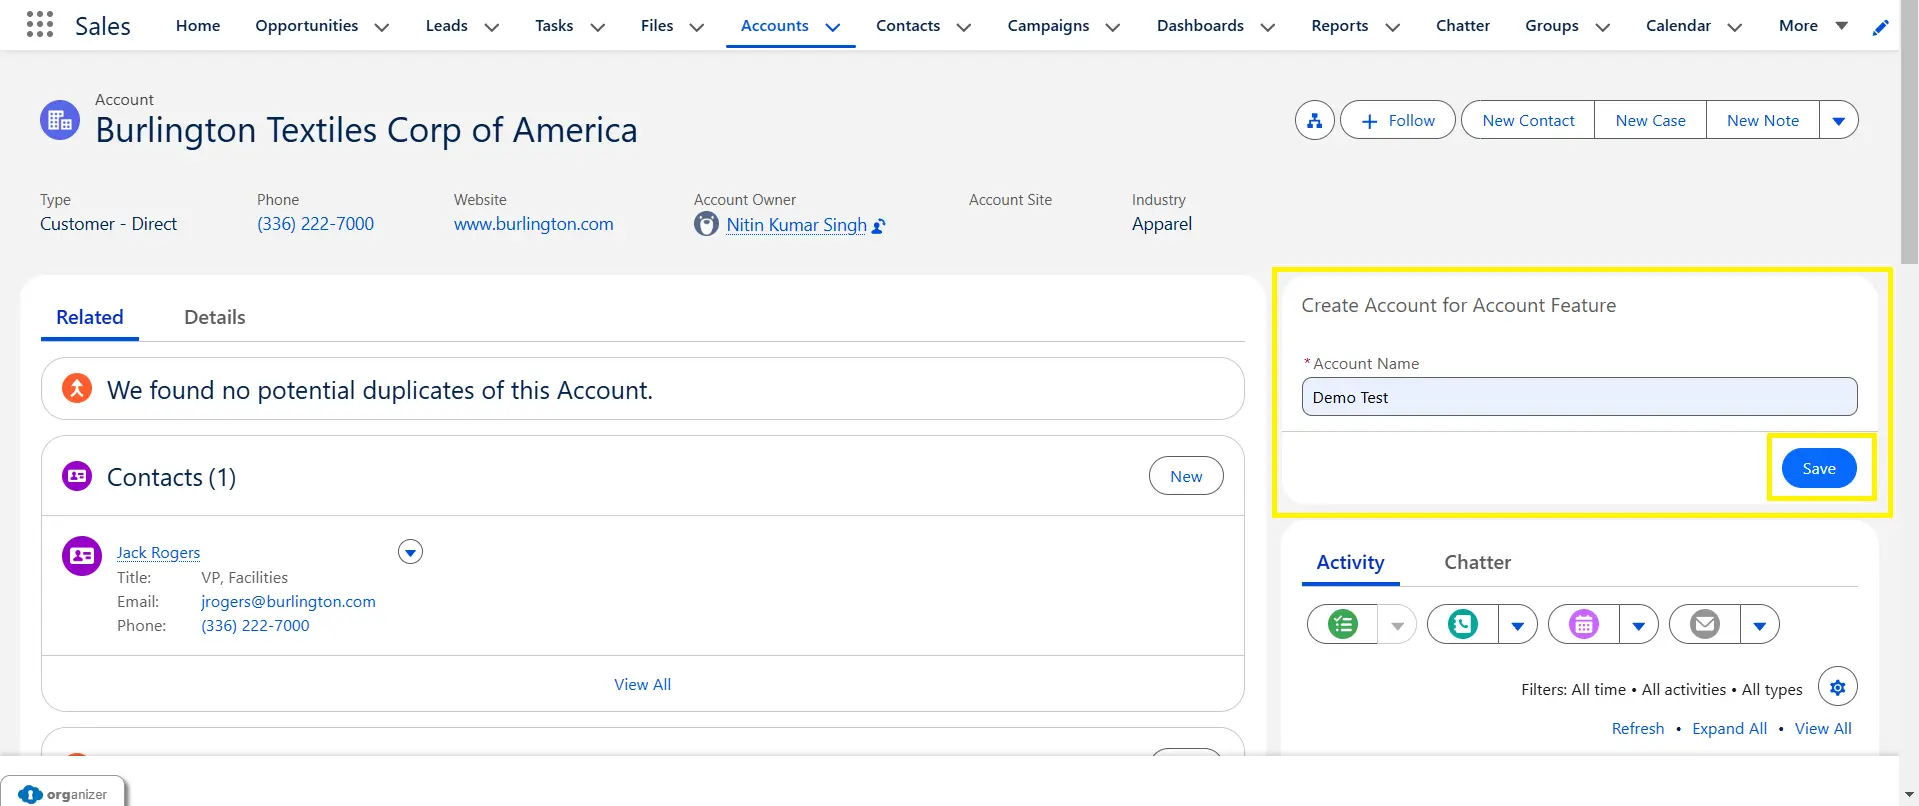
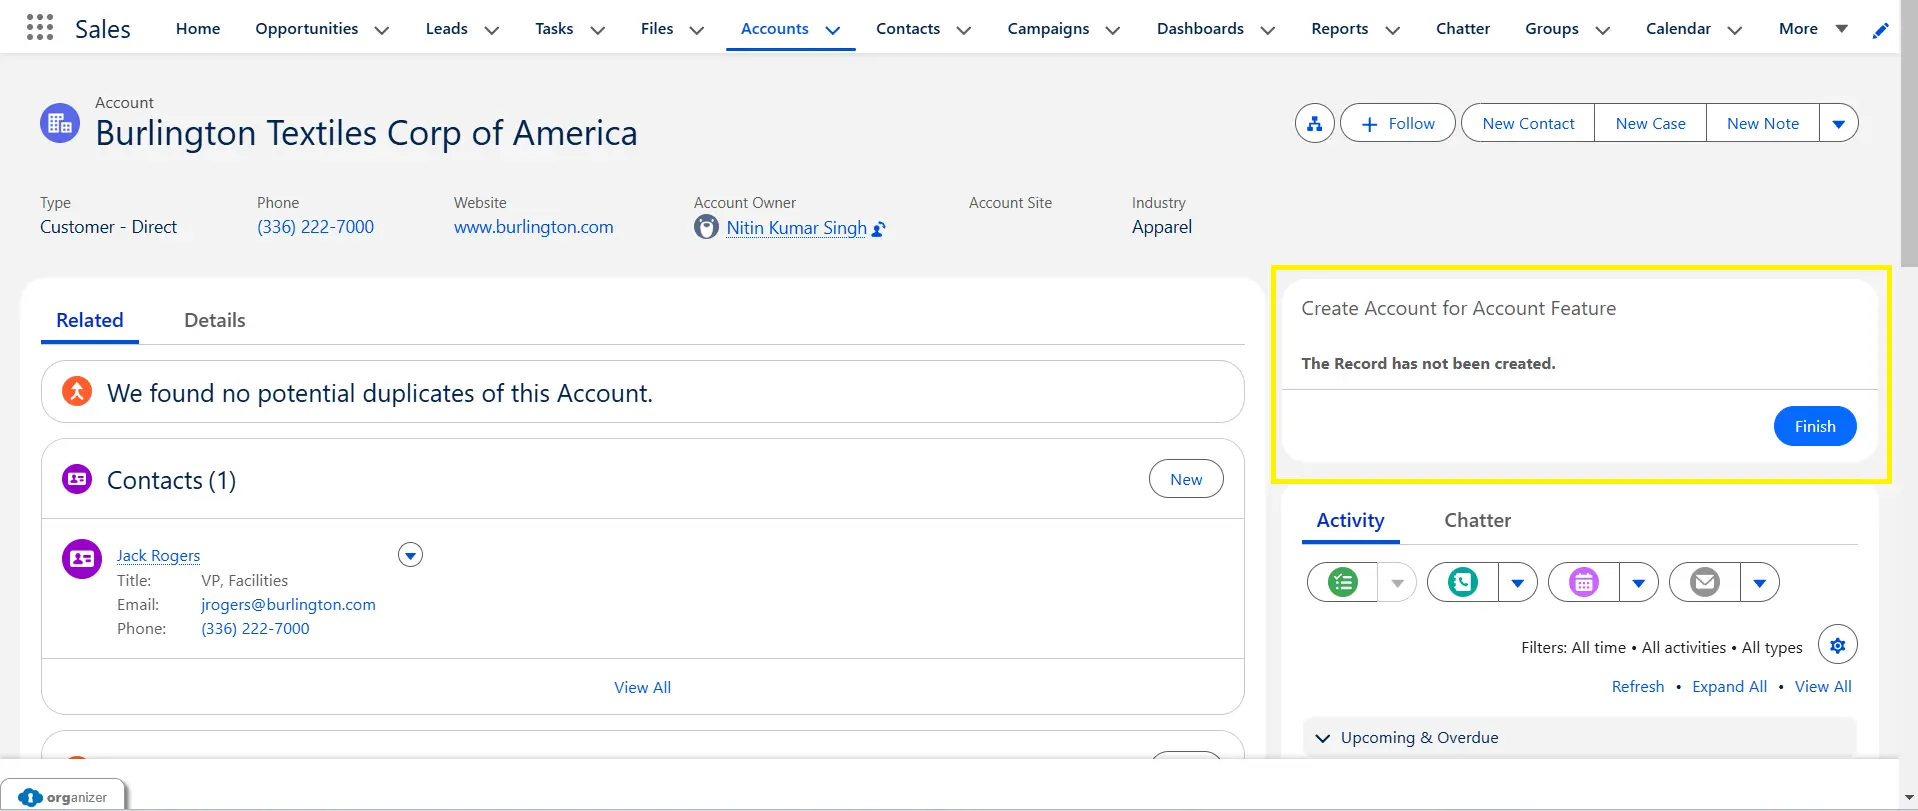
In this image when i click on Save button it will show me the error saying that “The Account has not been created”. because we didn’t assign the permission set to the running user.
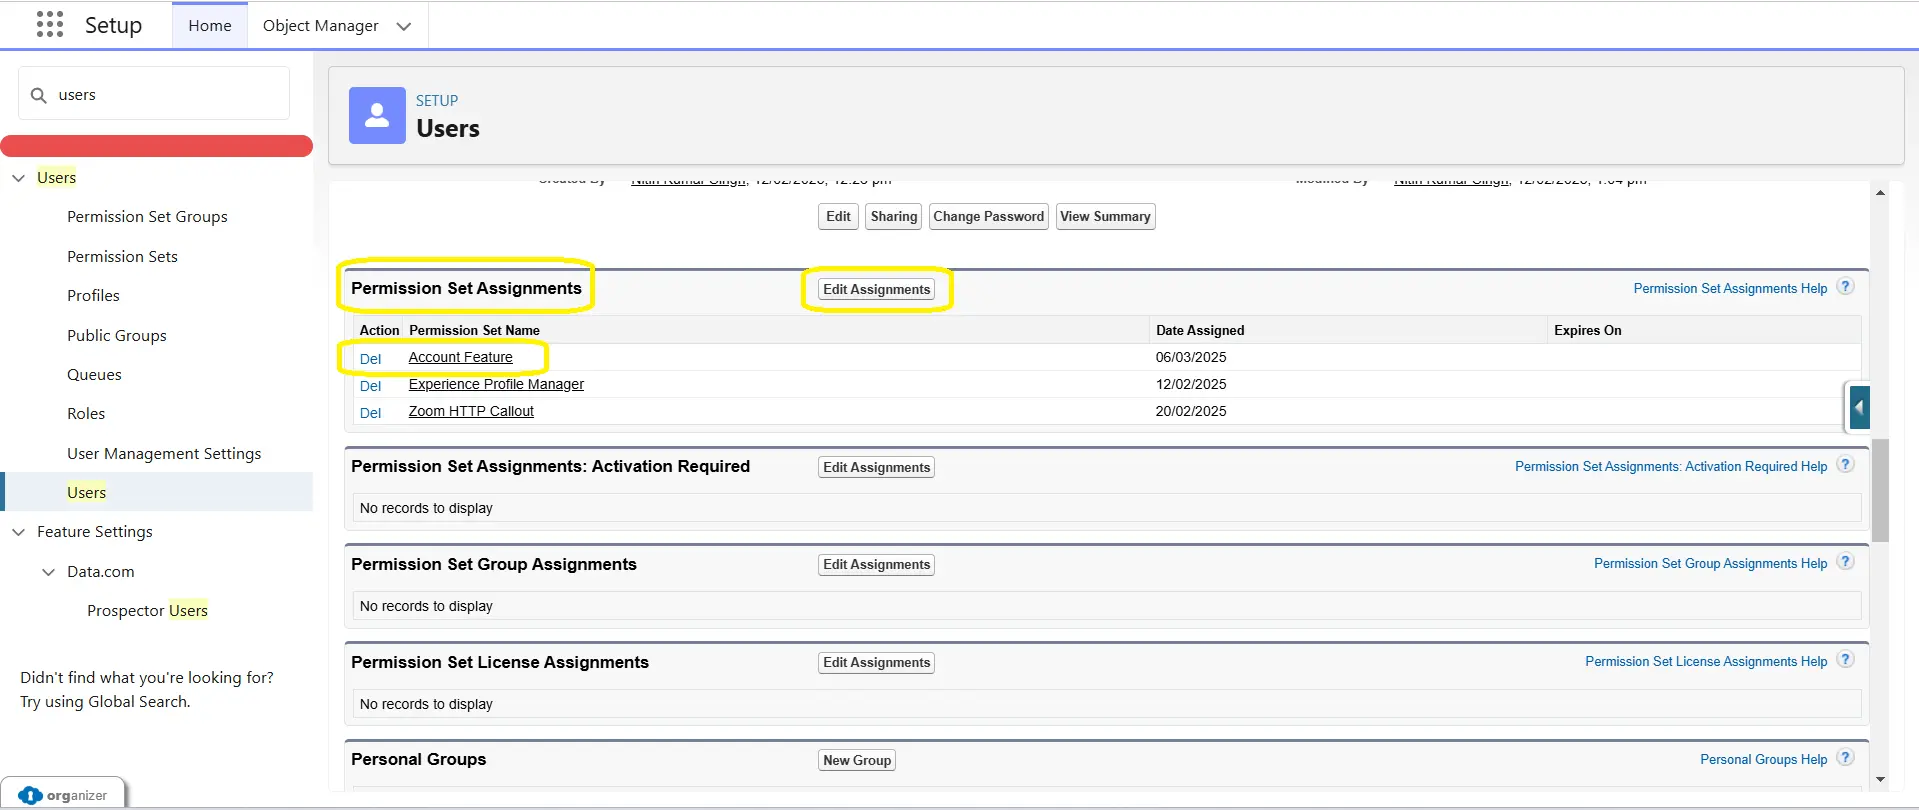
Now we will assign that permission set which has the custom permission to the running user so that the user can create account.
To Assign the permission set to user follow the below steps:
- Go to Setup → In the Quick Find Box → Users
- Select your user and then Select Permission set Assignments
- Click on Edit Assignment.
- Select you permission set from Available Permission sets to Enabled Permission Sets.
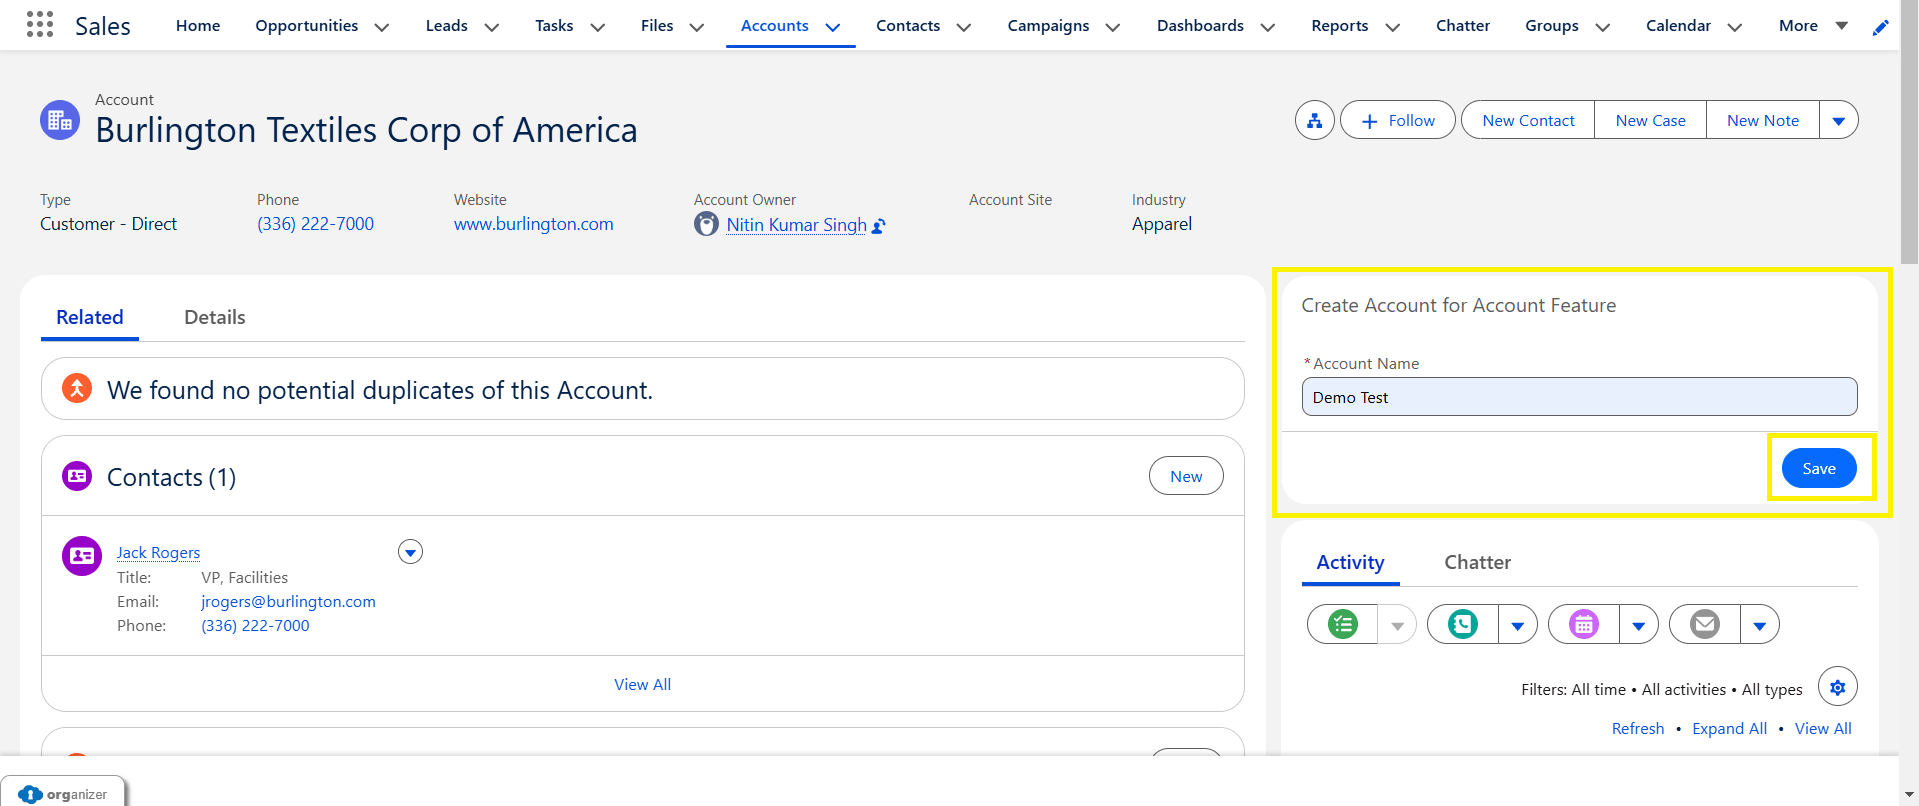
Now the running user has the required permission set with the custom permission assigned. It will allow him/her to create account successfully.
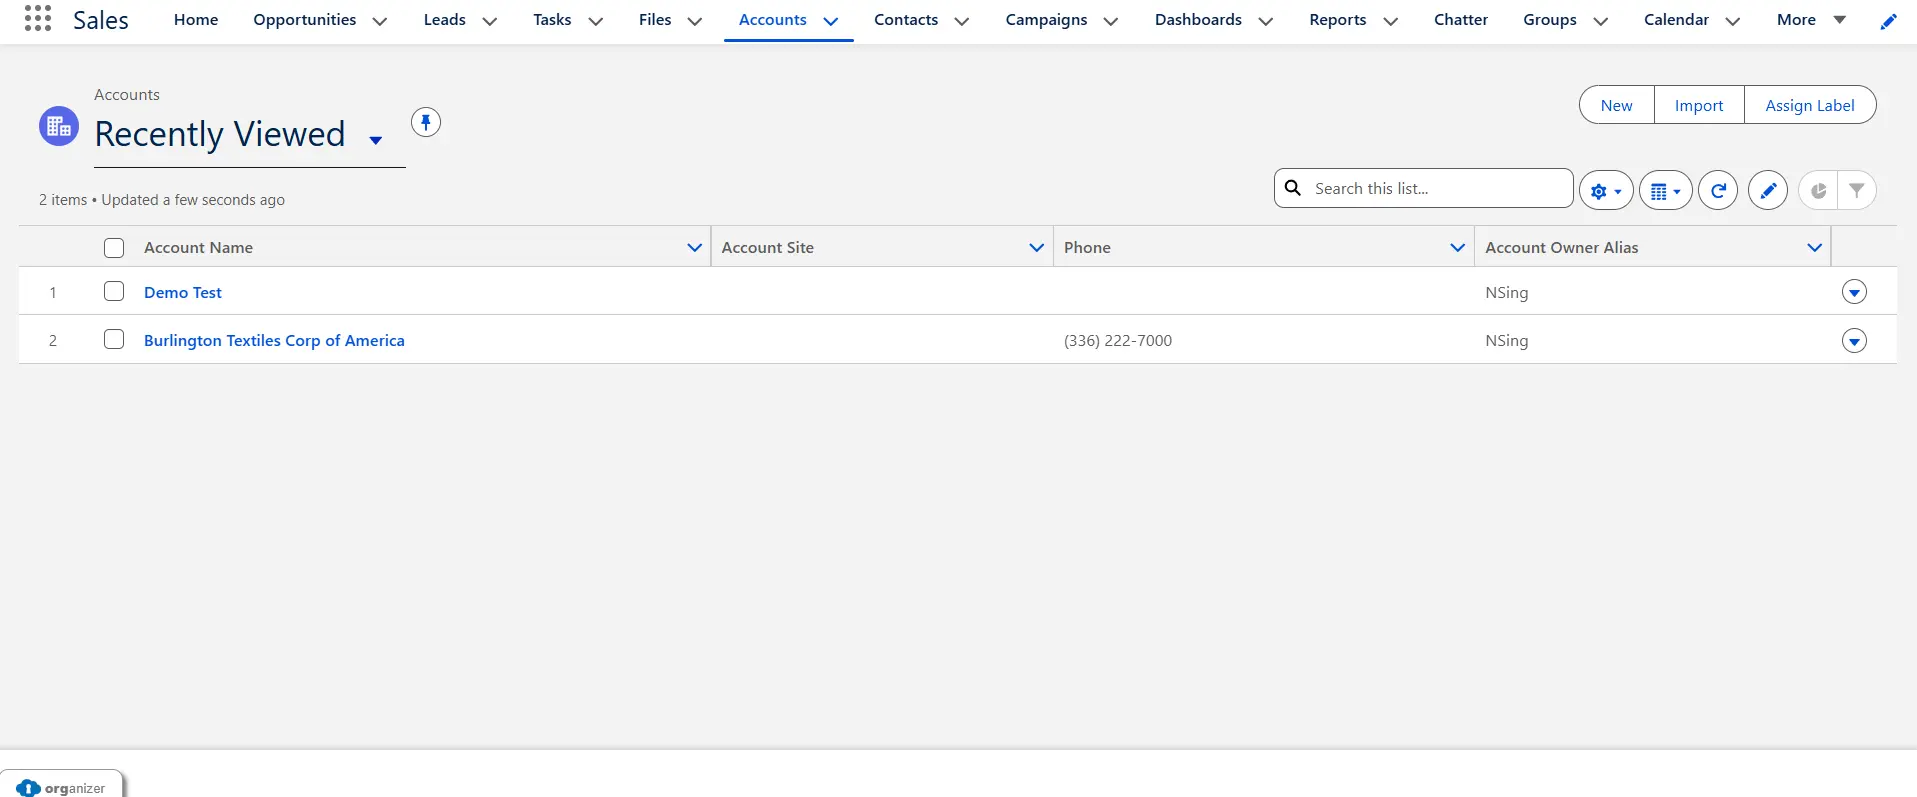
Below in the picture showing the successfully creation of account.
Now we can see the newly created account in the list view.
Conclusion for Custom permission in Salesforce Flow:
Custom permissions are a powerful, underutilized feature in Salesforce that gives admins and developers more control over user access. Whether you want to bypass rules, control button visibility, or manage special features, custom permissions make it easier to handle complex requirements without excessive code or profile customization.
Stay curious, keep experimenting, and we’ll see you in the next blogs. Also, stay tuned with The Pinq Clouds available on AppExchange for insightful blogs and updates. Happy coding!