
How to Display Related Contacts in Screen Flow Dynamically
Introduction
If you’ve ever needed to display related contacts in Screen Flow without writing a single line of Apex, this walkthrough will save you time and headaches. Screen Flows already offer guided, interactive experiences — but with a few smart configurations, they can also react dynamically to user inputs.
In this guide, we’ll create a Screen Flow that lets users pick an Account and instantly see all Contacts tied to it. No coding, no custom components — just native Flow features working together.
Business Scenario
Picture a sales rep getting ready for a client call. Instead of opening several records, they’d prefer a quick way to:
- Select the Account involved in the meeting
- Automatically view every Contact linked to that Account
- Stay in a single guided screen session
We’ll build exactly this experience using a Screen Flow + a helper Autolaunched Flow.
Step-by-Step Guide to Display Related Contacts in Screen Flow
Step 1 — Create the Autolaunched Flow
This will act as the engine that fetches related Contact records.
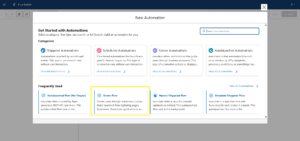
1. Go to Setup → Flows → New Flow
2. Select Autolaunched Flow (No Trigger) → Create

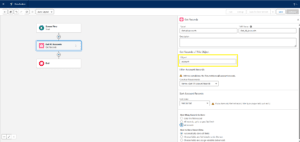
3. Create two Variables:
- One to store the selected Account Id
- One to hold Contact records

4. Open the Toolbox → New Resource → Variable
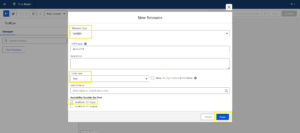
5. Add a Get Records element to fetch Contacts based on AccountId
- Save → Activate the Autolaunched Flow
This flow will later be invoked from your Screen Flow to retrieve Contacts dynamically.
Step 2 — Create the Screen Flow
- Go to Setup → Flows → New Flow
- Select Screen Flow → Create
This will be the user-facing flow where the interaction happens.
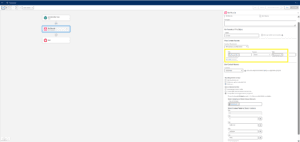
Step 3 — Add Get Records for Account Selection
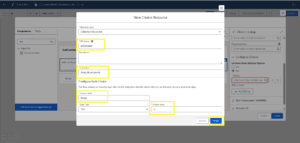
- Click + and choose Get Records
- Label it (e.g., “Get_Accounts”)
- Set the object to Account
- Store All Records in a collection
This gives the user a list of Accounts to choose from.
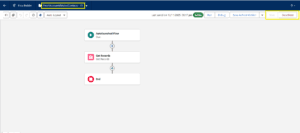
Step 4 — Add Screen Elements (Lookup + Data Table)
A. Add the Screen
Drag a Screen element onto the canvas and name it something like Select_Account_Screen.
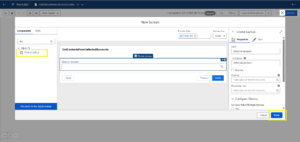
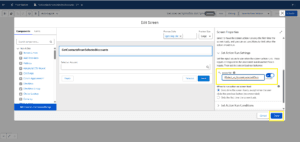
B. Add Lookup Component
Inside the screen:
- Component: Choice Lookup
- API Name: Select_An_Account
- Label: Select an Account
- Mark as Required
- Create a Collection Choice Set sourced from the Get Records output
This lets users search for and select the desired Account.
C. Add the Autolaunched Flow
Under Configure Screen Actions, call the Autolaunched Flow you created earlier.
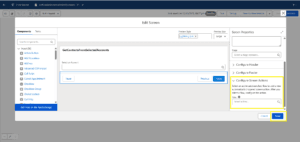
This step is what triggers the Contact retrieval dynamically.
D. Add Data Table Component
Drag a Datatable onto the screen:
- Map it to the Contact collection returned by the Autolaunched Flow
- Add columns like Name, Title, Email, Phone, etc.
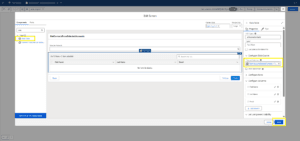
This will show all related contacts instantly after selecting an Account.
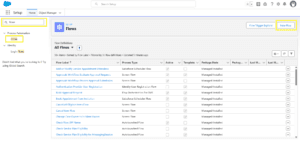
Step 5 — Save & Test the Flow
- Click Save and name your flow:
“Display Related Contacts in Screen Flow” - Click Activate
- Hit Debug → Run
- Select an Account and watch the Contacts populate immediately
- Click Save and name your flow: